Good morning friends ~ Mother's Day is right around the corner so I thought I'd inspire you with a Mother's Day card, featuring some
fabulous dies from Dies R Us. This is a picture heavy post so lets get started.
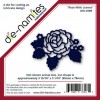
I started by cutting Die-Namites Rose With Leaves three times out of white card stock. On one layer, I adhered some Scrapbook Adhesive to the back of the card stock before running it through my die cutting machine. That way the adhesive was already on the back of the die for easy mounting.
I mounted the die with the adhesive onto my white Spellbinders square panel. This is one of their first die sets released so I'm not even sure it's available anymore but you can cut the square to the size that meets your needs for your project. I also mounted in all the negative spaces of the flower from this die, so the whole image was on the card stock. I then colored each negative space using Copics. Don't worry if your coloring runs onto the white border, as that's going to be covered by the other layers that were previously cut.
The Copic colors I used were: R12, R14, R17, G20, G21, G94, Y11 & Y13.
On the second layer of the die, I colored just the leaves using Copics and adhered it to the bottom layer, making sure it all lined up.
On the third and top layer of the die I simply fussy cut the leaves off the die cut leaving just the flower, which was then glued on the top, again being careful to line it up correctly. This completed the flower portion of the card.
Next, I die cut a Spellbinders Scalloped Square (again, very old) out of light blue card stock and pierced inside the rim of the die through the card stock to give it some interest and detail. The white flower panel is adhered to the scalloped panel and layered again with a Cheery Lynn Designs Nautical Wheeler Doily on the back. Let me just take a moment to say that this die is very intricate and it cut perfectly without shimming in just one turn of my die cutting machine. Incredible and perfect detail!
Next, I positioned the panel onto the card front, a regular A-2 sized card, and stamped the sentiment from My Creative Time's "Pretty Spring Wreath's" in red ink.
The gold metallic "MOM" die is from Cheery Lynn Designs Mom and this comes in a set of two, so it's a really good deal! A few white sequins finish this card off!
Supplies Used that you can find at Dies R Us:
QUICK DESIGN TIP: Before running intricate dies through your die cutting machine, add sheet adhesive to the back so when you cut it, it will be all ready to mount onto your project with adhesive on the back.
 |
click below for:
STORE CHALLENGE BLOG INSPIRATION BLOG Thanks so much for stopping by! Blessings~ Birgit |


10 comments:
THIS is beyond GORGEOUS! I love every die, every color every glorious layer! BEAUTIFUL!!!
Birgit, this card is so beautiful. I love every detail of it. I'm so sorry to hear you lost your mom last year. I'm sure you made this card with your mom in mind because you can see the love in each step. She is smiling and loving you from heaven.
Gorgeous card Birgit. Love the coloring on the rose... so pretty... great frame and layers. The style of the greeting is awesome.
Absolutely beautiful Birgit...I'm sure it will be treasured by whoever receives it! Lovely, lovely layers and just so much love and thought put into this beauty...totally in love with it!! :0)
Oh wow!! what a truly beautiful card!! I appreciate you giving such wonderful details of how you created it. The tips you share are awesome too! I would have never thought to put adhesive on before running it through the die cutting machine : ) brilliant! I also really love that you pierced the scallop on your die! I was just about to place an order for a die that did the piercing for you! This is even better : )
Birgit I could go on!! but your card is beautiful in every way!
Sorry about the loss of your Mom : ( my Dad's health has been failing and is in the hospital right now. It is so hard to even think of loosing him!
I have been continuing to hold you in prayer friend!
Patti
A beautiful card Brigit....great die altogether and what you did with it makes it even better.
I've spent the evening trying to come to terms with Altenew's Vintage Roses. I have watched the tutorial several times but boy there's a lot of learning to do.
Colouring in properly is so necessary for me....I'd like to be a perfectionist in this department but unless I'm prepared to practice it will not happen.
I'm sorry your Mother has passed on and if you are like me there is not a day goes by but I think of her and how she brought us up, all the hard work she did with no domestic appliances....all the garments she knitted and sewed, the home she kept for us and food on the table. I can still see her with the baking bowl in her lap beating cake mixture with a wooden spoon...oh I must stop rambling on....but I imagine you are the same.
Blessings and love from a very cold and rainy Northern Ireland.
Joyce
Elegant is RIGHT, Birgit! Oh MY!!!! Thank you for the tremendous class in today's post. I never thought about coloring separate layers and then finishing with a clean, crisp layer on top! Your shading is beautiful, but so is the dimension! Fantastic! Also, I like what you said about the adhesive layer. Is there a particular brand you use? Thanks for the tip about spacing the piercings in "ordinary" die cuts, too. WONDERFUL card, and even more wonderful post. Thank you so much! hugs, de
Hi Donna~ Thanks for being so kind and supportive!! I use Scrapbook Adhesive for my intricate die cutting but there are lots of similar products out there. That's just what I happened to find locally. Sending you (hugs) back.
Birgit, this is such a gorgeous Mother's Day card. Love it. So elegant and beautiful.
My goodness this sure is elegant! Love the way your frame that gorgeous bloom,Birgit!
Post a Comment