Showing posts with label Embossing. Show all posts

Thursday, July 30, 2026

Quilted

Hello friends ~ I know my posts have been few and far between, but I ask you not to give up on me.  I've just been enjoying family and enjoying summer as it all goes by too quickly.  Before long, I'll be hunkered up inside the house and will find plenty of time for crafting.  But for now, I hope you don't mind the occasional post.
 
I've been behaving myself, well mostly, this summer and not spending any money buying new craft supplies (save for a couple small purchases).  ;0)
Moreover, I've been pulling older sets out that haven't gotten much use and I've enjoyed it so much! 
 
This die is called Quilted "Summer" and it was from Papertrey Ink back in the day.   
I cut the die from scraps of printed paper in my scrap box and went to work piecing each quilt together.  I topped each quilted square with a die cut button in the center.
 
Each quilted piece is mounted to a different embossed background.
 
Except for this one, which is simply mounted on linen cardstock.
 
I used this as an opportunity to add to my birthday and anniversary card stash.

I'll be adding one of these cards to the following challenges:
Cut It Up ~ Emboss It 
Word Art Wednesday ~ Anything Goes 

Please don't give up on me.  I'll be back on a regular basis soon.
Thanks for stopping by!


Wednesday, September 17, 2025

Make Your Own Background ~ Double D

Hello crafty peeps!  Double D Challenges is starting a new challenge this week and the challenge is to make your own background.
I confess that I'm not very good at using techniques.  I tend to go the easy route and use printed papers for my backgrounds since I have enough to last me two lifetimes. 
 
Today's card was a delight to make and a good opportunity to pull out some neglected glitter glitz gel.

I adhered a vellum floral sticker to the center of a piece of Cougar Natural cardstock and used a brick stencil to add the glitter glitz gel randomly around the image.  I love the sparkle it gives!

I mounted that to a piece of printed paper to add more depth and a moody, romantic backdrop.  Win! Win!
 
Please take a moment to visit Double D Challenges to see more amazing designs from the talented team.

Thanks for stopping by!


Monday, November 27, 2023

Christmas Postage

Hello friends!  


The gals over at Sunday Stamps have a delightful inspiration board for you.  I loved the earthy tones with red and deep green, and I just happened to have recently made these two cards using those colors.  How perfect!!


My mom had these beautiful 8x8 papers of winter scenes painted by the amazing "Painter of Light", Thomas Kinkade.  I've sat on this bundle of papers for quite a few years now, wondering if I would ever use them.  Well, I'm so glad I did! I cut the front panel of the scenery using Waffle Flowers Postage Stamp die and mounted it to a panel of kraft cardstock.  I distressed around all the edges using Walnut Stain DOX ink.  I added these enamel stickers that I've had in my stash for ages.  Another box checked for using up ancient supplies!  

I popped the front panel up using foam tape, to make a slider pocket.   

 
Using the portion of the image that I had cut off for the front of the card, I made a slide out tag, adding some postage art stamps.  

I heat embossed the sentiment using chunky gold embossing powder.

I really loved how the postage die cut the panel of printed cardstock.  It looks like a page of stamps that I wouldn't dare cut apart!


The second card was much more simple than the first, as it's not a slider at all.

It's just wrapped up in prettiness!


I'll be adding one of these cards to the following challenges:

Word Art Wednesday ~ Anything Goes

Thanks for stopping by!

Monday, November 13, 2023

Vintage Christmas Tags ~ Mixed Media Monday


Good morning friends~  It's been a while since I've done a Mixed Media Monday post so I thought I'd pop in and share some vintage style Christmas tags I made recently.  
I participated in a box swap a couple of months ago where a box of unwanted supplies were gathered up in a flat rate box and shipped around to about 12 crafters.  Each crafter, upon receiving the box would take out what they wanted from the box and put the rest back into the box, adding in their own supplies that were no longer wanted or being used.  I was lucky enough to find these amazing vintage 3D images in the box.  In fact, I got two brand new packages of them!  

I die cut two tags using Sizzix Framed Tags by Tim Holtz out of white and soft blue cardstock.  I ran both blue tags through my die cutting machine using a very old Sizzix Alterations Vintage Postcard embossing folder, also from Tim Holtz. Using a brayer, I added Wedding Dress ink from Memento over the top of the embossing making the raised areas of the words stand out.  

I added a strip of bold lined paper from my scrapbox to the bottom of each tag and added Walnut Stain distress ink around the edges.  I glued these vintage images of boys having a snowball fight onto each tag.  The two tags together make the whole scene.  I added some Snow Glitter from Martha Stewart along the edges of the tags, and within the scene itself.  

I added old ribbon and twine to finish the tags off.
These tags make me think of a Norman Rockwell painting.  I think they'll be super cute attached to Kraft paper wrapped packages.

Thanks for stopping by!

Tuesday, November 8, 2022

A Trio of Gracious Peonies ~ Scrapbook Pal

Hello friends, I'm super excited to be sharing my first project as a fellow design team member for ScrapbookPal. 

Stenciling has made a huge comeback in the crafting world, and I for one am thrilled to bring you three cards I made using Altenew's Gracious Peoniesstampsstencils and the coordinating die.
  

You can find more details over on the ScrapbookPal blog.

Card #1

Card #2

Card #3
 

 Here's a list of supplies I used that can be found at ScrapbookPal:

Altenew Gracious Peonies Stamps
Altenew Gracious Peonies Stencils
Altenew Gracious Peonies Die
Altenew Warm & Cozy Ink Cubes

I hope you enjoyed today's cards as much as I enjoyed making them. 

Thanks for stopping by!


Wednesday, June 29, 2022

Circle Illusion 3-D Embossing Folder ~ Spellbinders

Hello friends~  Spellbinders has recently released a new line of 3-D embossing folders and they are fun, fun!  They're made to work with the new Universal Plate System, but I discovered the right sandwich using my Spellbinders Grand Calibur.

For my first card, I embossed a piece of white cardstock using the Circle Illusion Embossing Folder.  I added a sweet slice of pie using Serve A Slice from the Pie Perfection Collection.

Look at the crips detail in the embossing.  I recently learned that if you lightly spray your cardstock before running it through the machine with the embossing folder, that will prevent the cardstock from cracking.

For my second card, I was inspired by the amazingly talented, Yana Smakula.  She recently made a video explaining "Analagous Color Schemes".   I've had a color wheel in my craft room for many months and rarely use it.  I was so intrigued, I just had to give it a try. 

The flowers are cut using Petite Floral Potpourri.  The colors I used were Blue-Violet, Violet and Violet-Red.  What an interesting color combination, but I love it!  

I also used the 60%, 40%, 20% theory of using color, which she also explained in her video.  You can watch Yana's video by clicking HERE.  

For my final card, I turned to fall and one of my favorite die sets from Spellbinders to date.  It was such a joy to work with the Wagon Full of Fall die set again.  Mind you that I'm not rushing through summer!  But it's always good to think ahead.  As an added bonus, this die set is currently marked down to 40% off!

I've linked all the items I used below, for your convenience.  I am always incredibly grateful when you use my shopping links.  Thank you!!  
Thanks for stopping by!


Wednesday, November 11, 2020

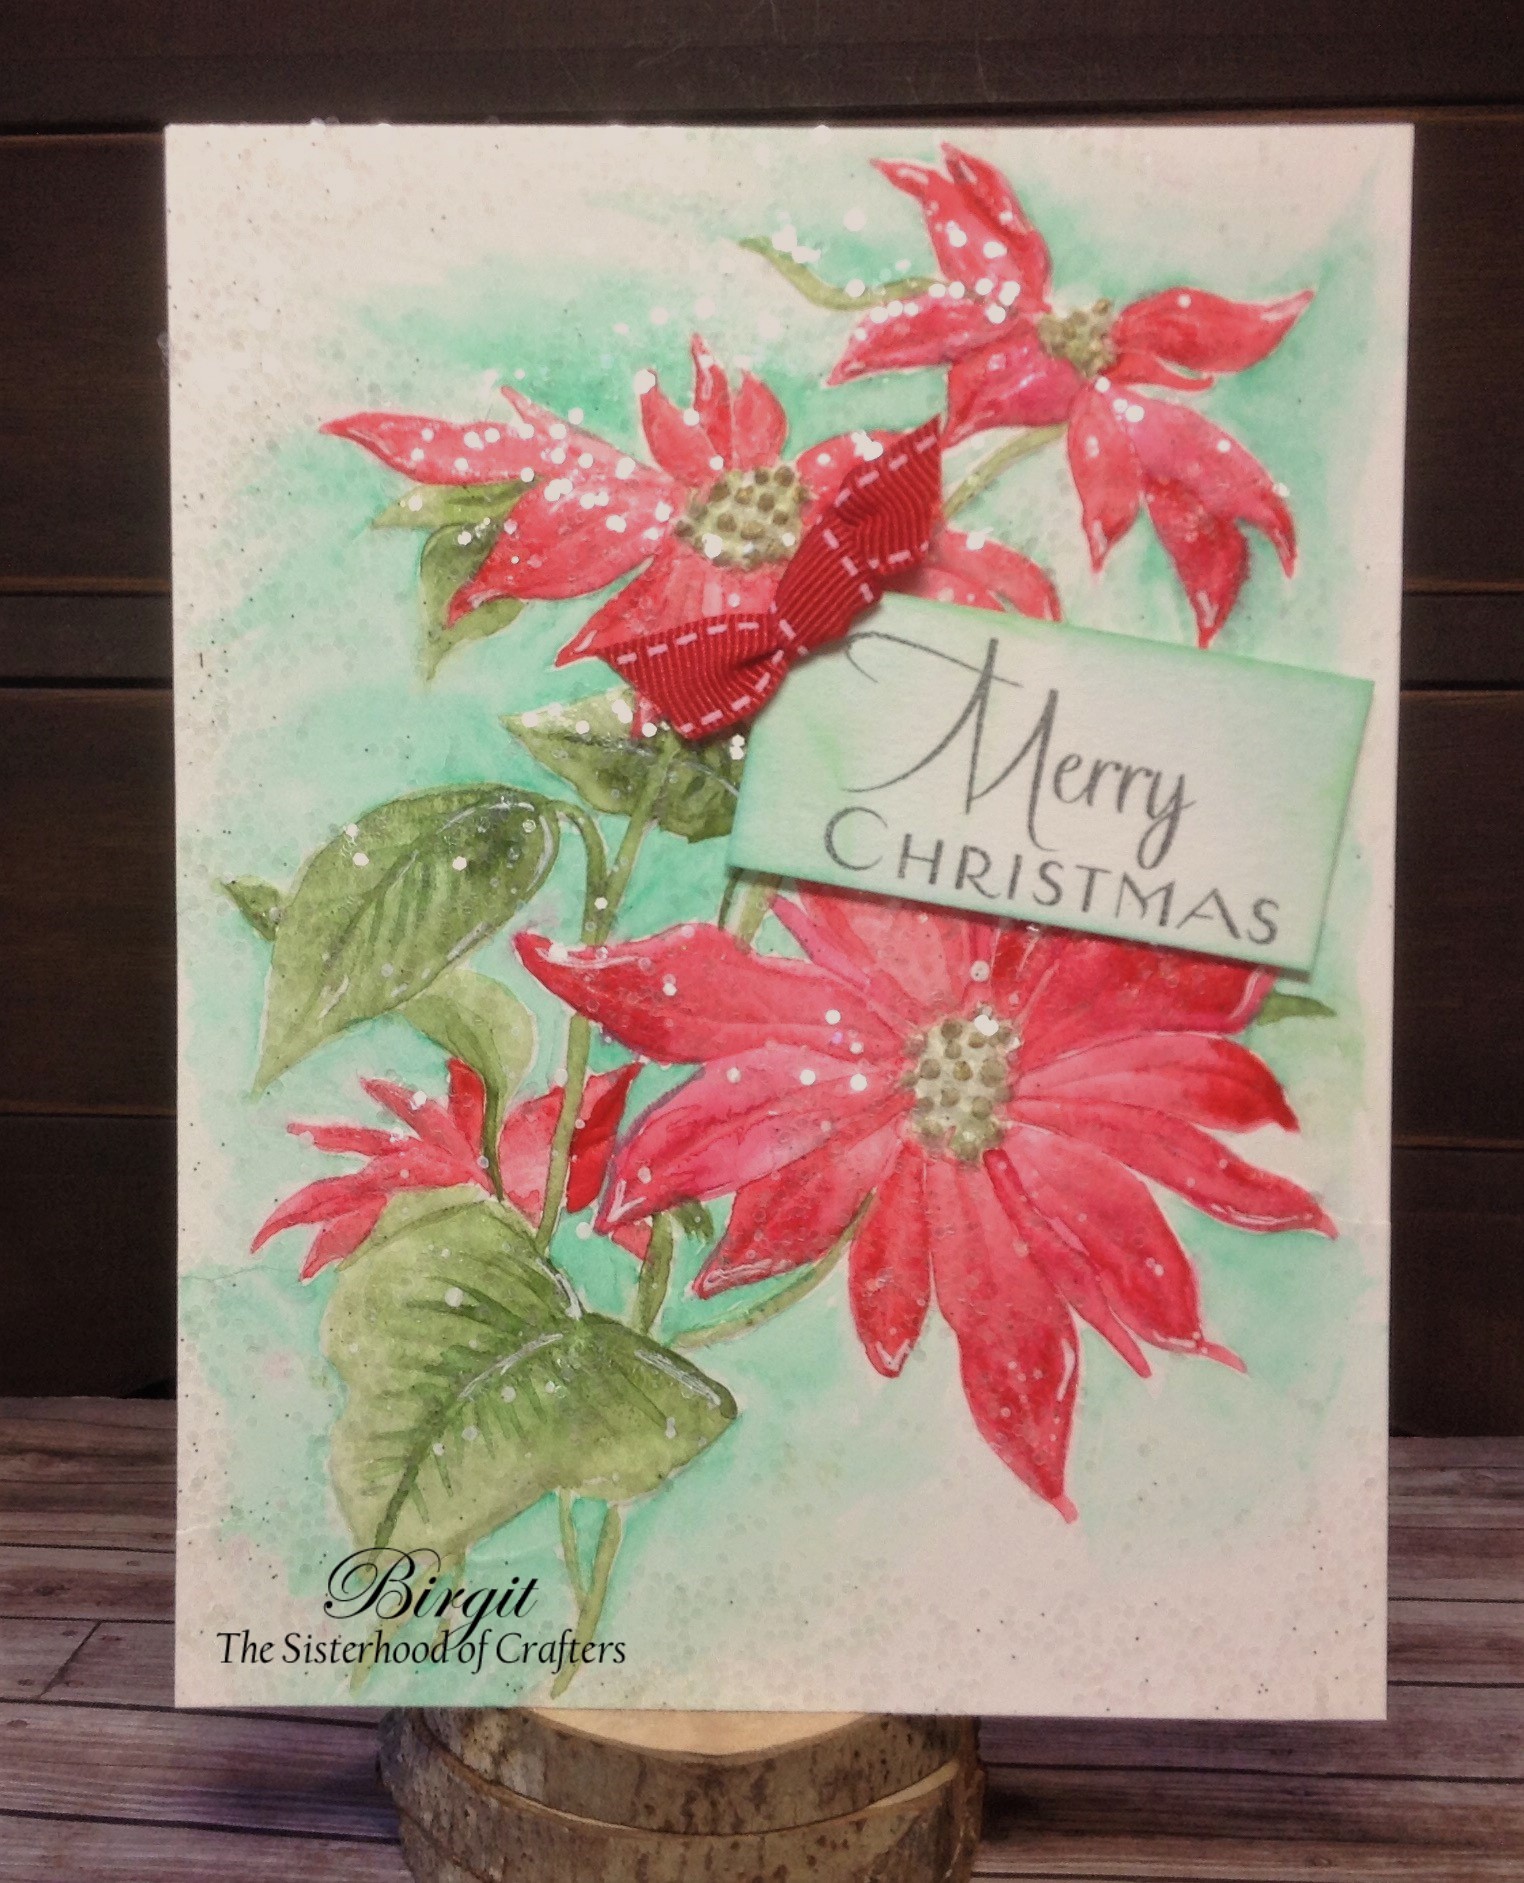
Vintage Water Color Poinsettia ~TSOC ~ Embossing

Hello everyone!  Have you seen the Tim Holtz 3D Texture Fades Poinsettia embossing folder yet?  It actually came out in August and that is when I'm typing up this blog post, so by the time you're reading this, it's probably "old hat".  But it's still awesome!!  It's one of those fabulous vintage / retro style images that is actually taken from a real vintage postcard.

The Sisterhood of Crafters is starting a new challenge today and the theme is "Embossing" so I thought this was the perfect opportunity to break this embossing folder in. 

I embossed the image onto a piece of Prima Cold Press Watercolor Paper and painted it using Kuretake Gansai Tombi Watercolor Paints
 
 After the completed panel was dry, I rubbed the Tsukineko Essential Glue Pad randomly over the top and sprinkled on some clear German Glass Glitter to complete the vintage look.

 Now it's YOUR turn to play along.  You can find all the details at The Sisterhood of Crafters or by clicking here.  We look forward to seeing what you create!

Thanks for stopping by!