Sunday, January 29, 2017

Cupcake Inspirations Challenge #392

Hello friends~  It's Sunday so that means it's time for a tasty new challenge going on over at Cupcake Inspirations.  
This week is a THEME challenge and the theme is "PLAID".  You can use any colors you wish on your card as long as it has PLAID on it.  

Our sponsor this week is


They are generously giving a $15 gift certificate to the winner of this week's challenge.  You really must check out their adorable stamp images!!

Even though we could use any colors we wanted, as long as there was plaid on the card, I was inspired by the whole package this week.  Plaid, colors and deer antlers made for a perfect masculine birthday card!
I have my dear friend Marcia to thank for that elegant looking deer cut out of kraft card stock.  She sent me several of them in a die cut swap we did a while back.  Thanks Marcia!!

Be sure to check out all the designers cards to see how they were inspired by this week's inspiration photo.  I know they'll wow your socks off!

I'll be adding this card to the following challenges:

Thanks so much for stopping by!  Blessings~ Birgit


Thursday, January 26, 2017

Valentine Shaker Card

Hello friends~  Valentine's Day is drawing near so I've got a quick and easy CAS Valentine Shaker card to share with you today using dies from Elizabeth Craft Designs.
I started by cutting an A2 size card panel out of Rich Black Soft Finish Cardstock.  From that, I cut the Leafy Lace Heart out from the center.  I cut another Leafy Lace Heart out of Ladybug Red Soft Finish Cardstock.  I adhered a piece of clear acetate using Clear Double Sided Adhesive onto the back of the Rich Black panel.  I then adhered the Ladybug Red Leafy Lace Heart over the top of the heart opening on the front of the card panel.  I added some foam tape to the back side of the card panel being careful that there were no gaps in the tape for the sequins to fall out.  I filled the center space with sequins, peeled the backing paper off the foam tape and adhered it to the front of a white, top folding A2 card base.  I added three flowers cut from White Soft Finish Cardstock using Bunch of Flowers 4 and added a red gem to the center of each flower.  To finish the card off, I adhered a piece of Clear Double Sided Adhesive to the front of a piece of White Soft Finish Cardstock  and cut the "XOXO" from Love Sentiments. After peeling the release paper from the from the front of the "XOXO", I added Cool Diamond Silk Microfine Glitter and polished it to make it shine and adhered it to the front of the card.  

I hope you're inspired by today's card.  You can find all the details on the products I used at Elizabeth Craft Designs.  

Thanks so much for stopping by!  Blessings~ Birgit


Tuesday, January 24, 2017

Dies R Us ~ Thank You Medallion

Hello friends~  I'm back again with a post for the Dies R Us Inspiration Blog
A heartfelt thank you card is in order today and you can find all the dies needed to make this card at Dies R Us
die cut a white card stock panel using Impression Obsession Small Flourish Background  and applied it to a double sided adhesive panel.  Once it was pressed into place I rubbed Elizabeth Craft Silk Microfine Glitter in Warm Diamond into the negative spaces.   

I then adhered the die cut panel onto a white base cut the same size as the panel and added it to the card front.  Just look at this pretty background!  This technique could be used for any type of card.
This Sue Wilson Thank You Circle is so fun to work with.  This die set has all the pieces needed to make a fun layered sentiment.  There's also a Birthday Circle!!  I cut each of the elements out in light blues and greens and the circles in white.  It made a pretty soft colored medallion.


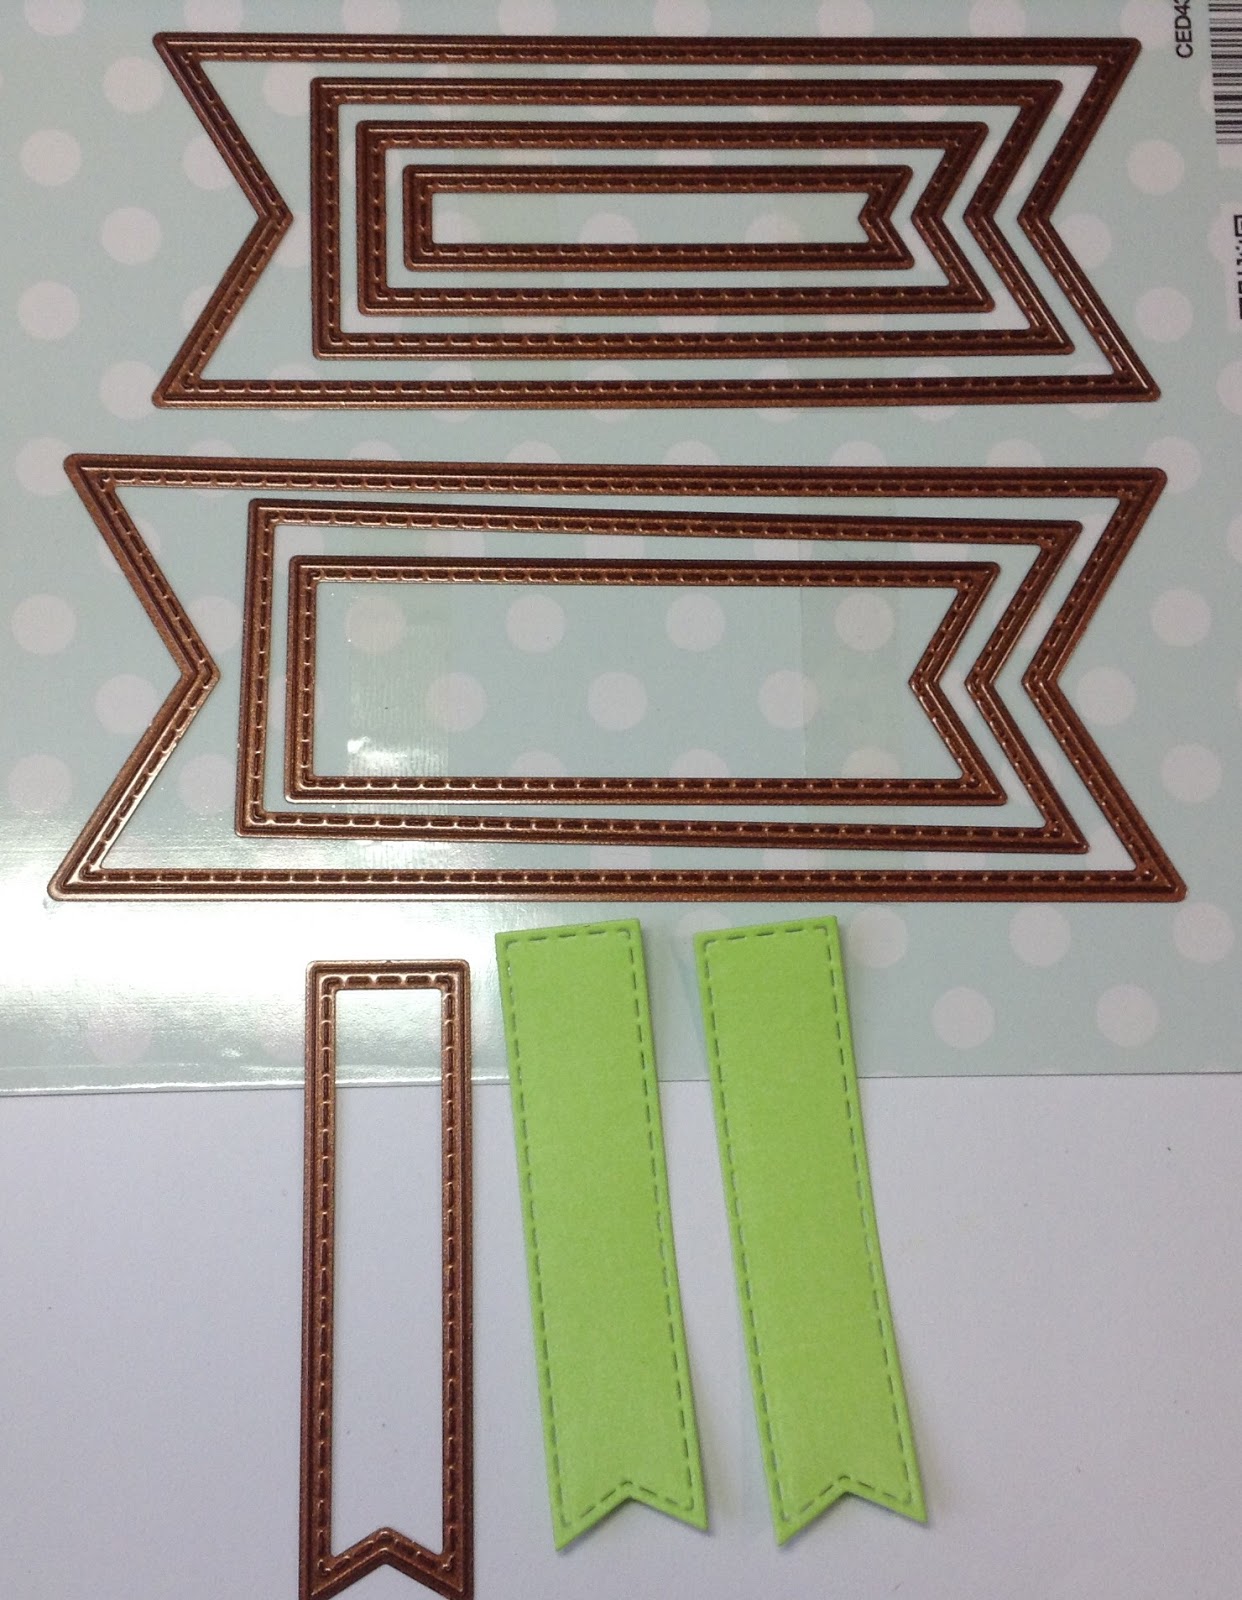
Every medallion needs fishtail tags to I paired the circle die up with Sue Wilson Stitched Flags.  Just look at all the sizes you get in this set!  I cut two out of light green card stock and added them to the medallion.


Here's a list of dies I used:
     

Don't forget to play along at the Dies R Us Challenge Blog for your chance to win a gift voucher to the Dies R Us Store.  A new challenge begins on the first and fifteenth of every month.  Be sure to Follow Us on Facebook too. 

click below for:
STORE
CHALLENGE BLOG
FACEBOOK
INSPIRATION BLOG


Thanks so much for stopping by!  Blessings~ Birgit


Saturday, January 21, 2017

Sending Love

Hello ~  I've got a quick and easy card to share with you featuring some amazingly cute dies from Elizabeth Craft Designs.
These Mushrooms from Joset Designs are so fun and whimsical!  I cut them out of White Soft Finish Cardstock and added color using Distress Inks and a blending tool.  I did the same using Joset's Birds.  The layers were cut using Stitched Rectangles.

I tucked a tiny heart into the birds beak and added a white flower from Bunch of Flowers 4 that I covered with Clear Wink of Stella and a gem for the center.


I hope you'll check out these products and more at Elizabeth Craft Designs.

I'll be adding this card to the following challenges:
Happy Little Stampers ~ Anything goes with dies

Thanks so much for stopping by!  Blessings~ Birgit

Friday, January 20, 2017

Playing Along with PTI MIM & Darnell

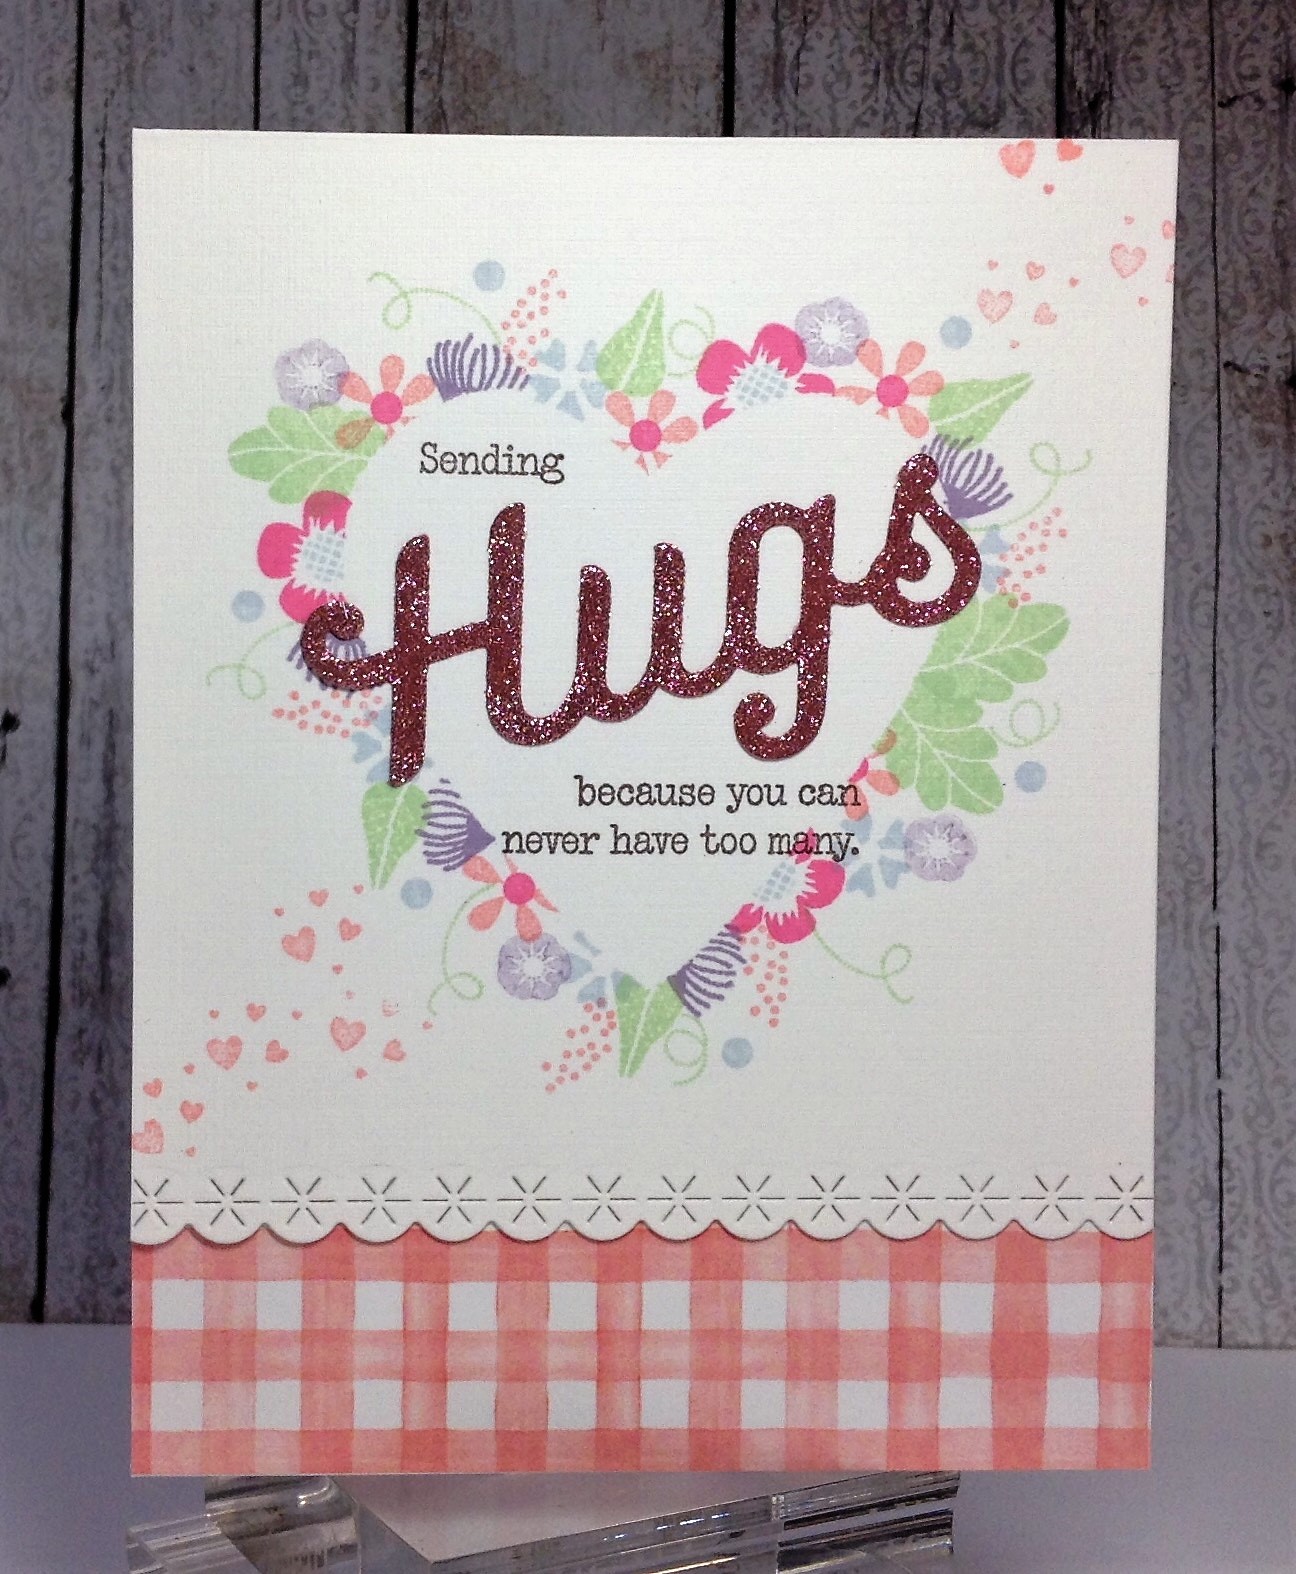
Hello~  I'm popping in with a quick post to share the card I made using Melissa's Masked Heart Wreaths technique for PTI's Make-It Monday.  It's been quite a while since I've played along but I couldn't pass up this opportunity to give this technique a try.  I love Melissa's style and this technique!!


I used a heart from Limitless Layers 2 ~ Hearts Die Collection and stamped around the heart using images from Embellished Elegance.  I used an "Eyelet Stitches" edger from from Poppy Stamps for the bottom edge of the stamped card stock and put a piece of scrap design paper behind it.  The sentiment is from Big Hugs.  I added some ECD Silk Microfine Glitter in Vintage Pink to the die cut word.  Notice the tiny hearts from corner to corner?  I saw that little stamp in the Big Hugs set and just had to add some bitty hearts flowing from corner to corner to add more movement.

Following Darnell's lead, here's "Today's Two-fer".
I'll be adding this card to her NBUS challenge since the colored pencils I used are NBUS and I've colored on Kraft, just as she challenged us.  The colored pencils were my mom's and they are from Stampin' Up! and this was my first time using them.  I've always used my Crayola's. ;0) 

The image is Altenew's Freesia.  I just love coloring this image on Neenah Desert Storm Card Stock.

I'll be adding one of these cards to the following challenges:

Thanks so much for stopping by!  Blessings~ Birgit

Thursday, January 19, 2017

Elizabeth Craft Designs ~ Birthday Birds On A Ladder

Good morning friends I'm happy to be sharing my very first post over at the Elizabeth Craft Designs Blog.  Now that Christmas and New Year's is over, I'm ready to use some spring colors in my craft palette.  These Love Birds from Joset Designs are just perfect for a mid winter pick-me-up!


I started by cutting a Soft Blue Soft Finish Cardstock  panel and mounted it to a white A2 sized card base.  I cut the Joset Designs Background out of Soft Blue Soft Finish Cardstock and adhered it over the card front.

I cut the Lovebirds out of White Soft Finish Cardstock and added color using Ranger Distress Inks.

Next I cut the Rustic Ladder out of Cafe au Lait Soft Finish Cardstock and added some distress ink around the edges.
 
Cut the words "Happy Birthday" out of Spring Green Soft Finish Cardstock.  Apply a generous coat of Zig 2 way glue pen to the top of the words and cover the words with Spring Peridot Silk Microfine Glitter.  When the glue has dried, polish the glitter on the words with your fingertip to bring out the maximum sparkle.  
Once the card was assembled I added some yellow Stickles to the birds wings and tail feathers.


I hope today's project has inspired you to break out your spring colors and create some sunshine for someone special.

Supplies Used:
Background
Lovebirds
Rustic Ladder
Happy Birthday
Soft Finish Cardstock in Soft SkyCafe au LaitSpring Green and White
Other Supplies Used:
Distress Inks by Ranger
Yellow Stickles glitter glue
Glossy Accents
Zig 2 Way Glue Pen

Thanks so much for stopping by!  Blessings~ Birgit


Tuesday, January 17, 2017

Dies R Us ~ Winter Skate

Hello~  I'm up on the Dies R Us Inspiration Blog today with a cool, wintry card that's just full of sparkle and shine. 
Today's card features this wonderful Elizabeth Craft Skate, which I just love!  
 I cut the blade out of silver card stock and the heel out of black and once the skate was assembled, I added a baker's twine lace.  Just look at the detail on this skate!

Just look at this lovely snowflake border by Joy Crafts!  I applied glue from a Zig pen and dusted the whole die cut with Elizabeth Craft Silk Microfine Glitter in Warm Diamond. 
This particular die was available for special order from Dies R Us so it is not regularly stocked, but there are a few other snowflake borders that are just as lovely in the online store.  This one from Precious Marieke is equally stunning!!

I embossed a background panel using a Darice Embossing Folder

I cut these snowflakes out of white Card stock and applied the same Silk Microfine Glitter Treatment to them, using  the color Sea Glass.  They are stunning in real life.  

 
Here's the completed card.  There's so much sparkle and shine, I just wish it came out better in the photo's.

Here's a list of products I used to create this card:
I used a couple of dies that were  part of the same special order deal, so be sure to sign up for the Dies R Us Newsletter.  You'll be the first to know when they offer special order dies and when they are having awesome sales.
  
 Don't forget to play along at the Dies R Us Challenge Blog for your chance to win a gift voucher to the Dies R Us Store.  A new challenge begins on the first and fifteenth of every month.  Be sure to Follow Us on Facebook too. 

click below for:
STORE
CHALLENGE BLOG
FACEBOOK
INSPIRATION BLOG

Thanks so much for stopping by!  Blessings~ Birgit