Friday, September 29, 2023

Country Road

Hello friends ~ Just thought I'd pop in and share a trio of cards I made using Spellbinders Country Road Collection of dies.
This is such a delightful collection from designer Annie Williams.  
This collection really hits home, considering it's very similar to where I live in the country.


For card number one, I started with the Welcome Sign & Sentiments to create this peaceful scene.  I added greens and flowers and the darling kitty from Garden Builder.


Card number two focuses in on Rustic Garden.  I love all the elements in this die set but I think the barrel and water pump are among my favorites in this collection.  I added more greens and flowers from Garden Builder and a sign from Welcome Sign & Sentiments.  


Card number three  features the wagon wheel from Rustic Garden, flanked with flowers and greens from the Garden Builder collection.  The sweet little kitty made another appearance here on this card.  Perhaps he's waiting for the tiny bird to return to his home.


Here's a list of products I used from Spellbinders:

Welcome Sign & Sentiments
Garden Builder
Rustic Garden
Entire Country Road Collection


While you're there, check out their amazing New Arrivals and what's Coming Soon.  They also always have a great selection of items marked down on Clearance.

Collecting the pumpkins from the field across the street from me.

Thanks for stopping by!

Tuesday, September 26, 2023

Warmest Wishes Birdhouse Pop-up ~ Poppystamps

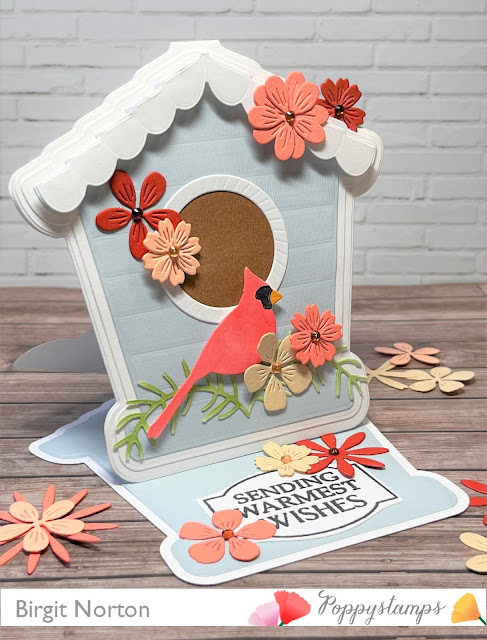
Hello friends ~  Cardinals are beautiful birds, don't you think?  I'm an avid back yard bird watcher and I feed the birds year round, along with all the chipmunks and squirrels that help themselves to the black oil sunflower seeds we offer.  

The Bird House Pop Up Easel Die Set from Poppystamps is the focus of my project today.  I've paired it with some flowers from the Potpourri Flower Set.

Let's get started.
First off, you'll have to cut two of the base  shapes. 

 These will get glued together on the little scored flaps, on the short side.  This is the base of your easel pop up.  This step is so easy!  And now for the fun part...  Decorating it!

The cardinal and the pine sprigs are all included in this set.  I cut mine out of white cardstock and colored them using Copic markers.

I also cut out four different colors of flowers using the Potpourri Flower Set.

I cut the front frame of the birdhouse out of light blue cardstock and glued  the card the layers together.  Once all the cutting and coloring were done, it was time to decorate, popping flowers in here and there, and a few were popped up using foam dots.

I cut another layer of the same blue cardstock, using the birdhouse frame, for the inside of the card.  The sentiment is stamped using Gilded Christmas Wishes and cut using Colwell Label Set.  I chose this sentiment because I thought it would also work well as a birthday greeting.  This is a great way to extend the use of your Christmas greetings.

I finished the centers of each flower using Autumn Fairy Jewels.  These self adhesive jewels come in just about every color!
In Focus:
A photo to show the dimension.


Here is a list of products I used today, that can be found at Poppystamps:

Bird House Pop Up Easel Set
Potpourri Flower Set
Colwell Label Set
Gilded Christmas Wishes
Fairy Jewels


I appreciate you stopping by today!  I hope you find some time to make something crafty.


Wednesday, September 20, 2023

Birthday Balloons ~ Double D Challenge

Good morning friends~  Double D is starting a new challenge and the theme is "Birthday Balloons".  

I'm always in need of masculine cards so I used this challenge as an opportunity to add one more masculine card to my stash.

I pulled out some older Papertrey Ink sets and the Balloon Cover Up from My Favorite Things.

Using my favorite colors of Distress Oxide Ink, I popped three of the balloons up with foam squares to add dimension.  


Here's the inspiration photo to help get you started:


And here's the prize that will be sent to the winner of the random draw:

Pop on over to the Double D Challenge blog to see more inspiration and join in on the fun!

Thanks for stopping by!

Monday, September 18, 2023

Strawberry Fields ~ Mixed Media Monday

Hello friends ~ Welcome back to another installment of Mixed Media Monday.
Today's art journal entry features a wonderful collection from Simple Stories called Simple Vintage Berry Fields.  I just love the sun-shine colors in this collection!

I started by covering a page in my Create Happiness Art Journal with a sweet country yellow, gingham paper from Simple Vintage Berry Fields 6x8" Paper Pad.  If you look closely, you'll see the subtle image of a mason jar.  So reminiscent of farm fresh country.  I distressed the edges of the page and splattered on some Walnut Stain Distress Ink.


I layered on some ephemera bits from Simple Vintage Berry Fields Ephemera.  The strawberries are stamped using Sunny Studio Berry Bliss.  I love how real these look when stamped!

The "Oh Happy Day" stamp is from 49 & Market Vintage Artistry Dream stamp set.  The acetate butterfly, leaves and flowers were found on Amazon and the postage stamps are actual vintage stamps found in my vintage stamp collection.

Here's a list of products I used:


I hope you enjoyed today's project.  Do you keep an art journal?  Let me know in the comments.  I'd love to stop by for a visit.

Thanks for stopping by!

Saturday, September 16, 2023

Make It Merry Holiday Card & Tag Kit ~ ScrapbookPal

Have you ever purchased a card making kit?  The Make It Merry Limited Edition Holiday Card & Tag Kit is one you won’t want to miss! I'd like to show you how I get acquainted with, and create cards & tags using this Spellbinders kit, available at ScrapbookPal

Let’s get started.  


There are loads of die cuts, stickers, sequins, gems, card stock and two sizes of pre-folded cards and envelopes included in this kit, plus so much more. I start by removing all the pre-printed die cuts and sorting them out on my table so I can have a clear view of what’s included in the kit.  Just look at all that holiday goodness!


I then start layering the die cut elements together, creating cluster focal points using Bearly Art Precision Craft Glue and Foam Squares to add dimension. 


Once I feel happy with the focal clusters, I add them to card fronts that have been covered with the design paper that is included in the kit.


I also like to add twine as well as other embellishments from the kit.


Some of the card fronts are layered with different papers.  See how I added movement to the banner by giving it a slight bend and adding liquid glue to each side of the banner.


There are endless possibilities in this kit!


I also made some gift tags, and I go through the same process to make the tags.

I used the Tim Holtz Framed Tags to cut the smallest size tag and added lots of die cuts and foam stickers, finishing them off with some twine.


I have tons of supplies left over, enough to make oodles of cards and gift tags for the holiday season.

I hope you’re inspired to pick up this card kit today and let the fun begin.  


Here’s a list of products I used today that can be found at ScrapbookPal:

Spellbinders Make It Merry Limited Edition Holiday Card & Tag Kit
Tim Holtz Framed Tags
Bearly Art Precision Craft Glue 
Foam Squares


Thanks for stopping by!

Thursday, September 14, 2023

You Are My Sunshine

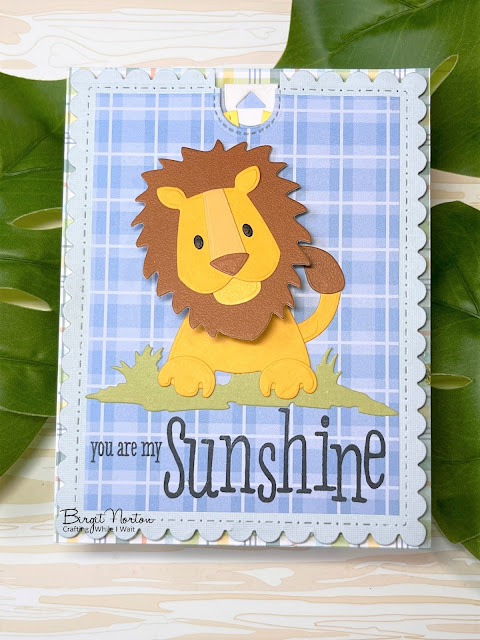
Hello friends ~ My sweet little grandson recently celebrated his first birthday, so I thought I'd share the pop-up card I made for him.

I was inspired by one of the pop-up books he has called Peek A Boo Sunshine. 

 One of the pages has a smiling sunshine that slides up out of the page.  I wanted to create my own idea of that, using this darling Lion die from Marianne Designs.

The lions head is attached to an action wobbler, so his little head wobbles back and forth.

The pop-up part of the card has sunshine and clouds that are super old dies, but timeless in style.  I stamped a smiley face onto the sunshine using a stamp from Peachy Keen Stamps, adding some copic and white gel pen details.  There's a large vellum cloud and some smaller white puffy clouds.

I made a few mistake here and there but overall, I'm happy with the way it came out. 

Here's a picture of our little "C" when he was born:

And here he is today!

The little doll is the size that he was when he was born.  He weighed just over 2 pounds.
He's now a strapping 12 pounds
and doing big boy things.

I'll be adding this card to the following challenges:
Word Art Wednesday ~ Anything Goes
The Sisterhood of Crafters ~ Die Cuts / Anything Goes

Thanks for stopping by!